Category Make

Build Your Own Wicking Bed

bed

We know plants need water to grow, however understanding when and how much they need can seem like a mystery only ‘green thumbs’ can solve. Enter the wicking bed!

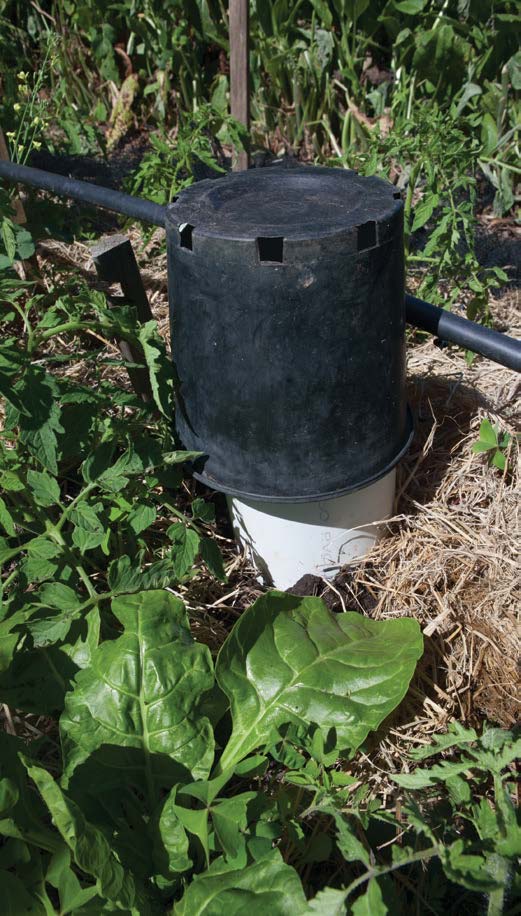
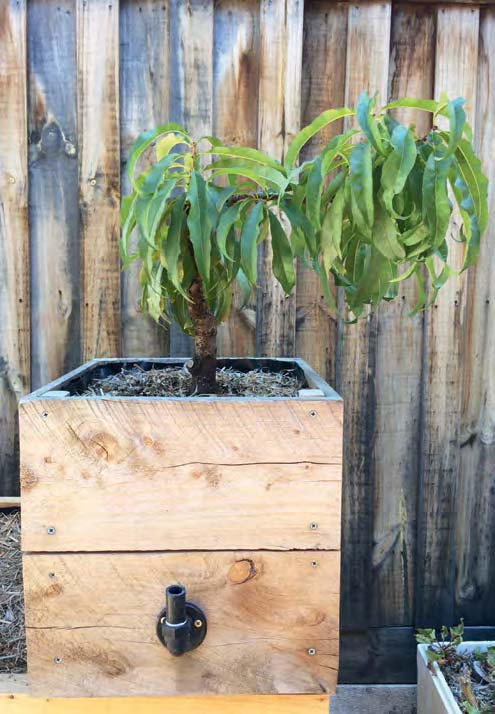
Wicking beds are an innovative vegie bed irrigation solution. They minimise the watering challenge by creating a water reservoir that sits underneath the soil your vegies grow in. A typical wicking bed has a waterproof lining in the bed, on top of which is a layer of small stones. The stones are then covered with water, landscaping fabric is laid on top and the soil goes on top of that. There’s an inlet pipe and a special overflow setup that prevents the water level from rising up into the soil, which would compromise plant health. The water below the soil layer literally wicks up into the soil, maintaining optimal soil moisture levels at all times (so long as you remember to occasionally top up the reservoir).

Wicking beds will typically have less complications than dripline irrigation, will lose less water to evaporation than overhead sprinklers, and take much less time to top up than it would to hand water the same size bed. Knowing when and how much to water is a breeze. All you need to do is simply top up your bed until water flows out of the overflow outlet.

Granny Square Fingerless Gloves

gloves

Fingerless gloves are perfect for keeping your hands warm without restricting your fingers. Here is how to make a pair of retro style granny square fingerless gloves. Rather than being strict instructions, this is an inspirational idea kind of pattern.

As is the tradition of making granny squares, leftover and small quantities of yarn are used in this pattern. You’ll need a basic knowledge of crochet and knitting to be able to whip them up.

Sew Away Don’t Throw Away: DIY Plastic Free Ideas

7

Step 1. Make your pattern

Take one of the sheets of paper and fold it in half lengthwise. Glue the other sheet along that centre line. On the right edge, measure down 6 cm and mark. This is your marker for where the drawstring goes.

Step 2. Cut your fabric (using your pattern)

Fold your fabric, right side to right side, and pin the pattern to the fabric. Don’t forget to cut a notch on the right edge where you marked the drawstring entry point.

Make Your Own Worm Tower

worm-tower

A worm tower provides an easy way to have selffertilising stations throughout the garden. They’re a good option for people not wanting to get ‘down and dirty’ with their worms. Traditional worm farms require checking of temperatures, moisture, food uptake, etc., but with a worm tower, after it’s placed in the garden, you simply need to put some food in every few days, keep it moist and covered, and the worms do the rest.

Worm towers can are much smaller than traditional worm farms. They’re cheap, especially if you use recycled materials, and you can make one in under an hour! The traditional worm tower is a vertical pipe with holes drilled around the bottom half that gets dug into the garden. It becomes the house and feeding station for the compost worms. Your job is to feed the worms periodically with organic matter and the worms will transform it into worm castings and worm juice. This then leaches into the soil around the tower, increasing overall fertility and helping retain moisture.

Home Brew Beer And Cheer: Make Your Own Sustainable Beer

home-brew-beer

The craft of brewed beverages, particularly beers, is enjoying a renaissance at the moment. This is based on a rediscovery of lapsed techniques and the inquisitive minds of home and craft brewers.

For the permie, home brewing can reflect permaculture design principles. You need to ‘apply self-regulation and accept feedback’, as a boorish drunk is no fun. There is also an opportunity to ‘obtain a yield’, with three of the four main ingredients of beer easily collected (water), cultivated (hops) or cared for (yeast). The fourth ingredient (malted barley) can be grown and processed, however this is a task for an adventurous spirit.

A DIY home brew offers several advantages over the shop bought product. Firstly you have much more control over the product, its provenance and its ingredients. Secondly you have the ability to make truly wondrous beverages not available from the run of the mill bottle shop. Thirdly you can do it for a fraction of the price. A from scratch home brew can be made for between 75 cents and $2 a litre; saving you from working for the man and saving you some cash for your next project.

Basic Beanie Pattern

basic-beanie-pattern

This simple beanie pattern is a breeze to whip up in sizes for everyone in the family and is perfect for early rising gardeners to take the chill off winter mornings. The simple construction makes it a great step up for beginner knitters who are ready to move on from scarves, but aren’t quite ready to knit in the round. You can fancy it up by using a self-patterning yarn either bought from the shop or home-dyed using beautiful natural pigments (see Pip Magazine issue 7 for our how-to on natural dyeing!).

MATERIALS

1 x 50 g ball of 8 ply yarn

(x 2 for a large beanie)

Pair of 5.5 mm needles

Yarn needle for sewing up

Natural Dyeing: Colours From Nature

natural-dyeing

There’s dye in everything, really’, says artist Deborah Brearley, as she unpacks oxalis, lichens, rusty nails and an array of other gathered materials onto the kitchen bench: all ingredients for the natural dye pot. Deb has been dyeing textiles using natural pigments for more than three decades, and in the world of natural dyeing that makes her a bit of a master.

‘This is like a journal’, she says as she produces a loop of twisted-wool dyed samples, with handwritten tags such as Lichen (Paradise Falls, Apollo Bay), winter 1979 and Orange fungus (Perrys’, Bacchus Marsh), winter 1981. The journey of her life is noted on these tags, a record of her art and travels, tracking the seasons and places she has been. As well as dyeing her own fibres, Deb spins her own yarn and knits it into garments and artworks. Her art practice is multidisciplinary – including painting, quilting and photography; she’s committed to understanding and valuing materials and processes, from ground pigment to finished artwork.